
Overview:
The Multi Signers (MS) feature empowers users to create forms that require multiple signatures in a sequential manner. This feature supports up to 10 recipients in a chain, offering a versatile solution for multi-step approval processes.
Activate the Multi Signers Features:
- Under ‘System Settings page.
- Enable the Multi – Signers feature by ticking the Activate checkbox.
- Select where the signed document is saved. Options: Parent, Signature / or Signature.
- Tick the ‘ Keep a PDF of each step’ if you wish to save the step separately.

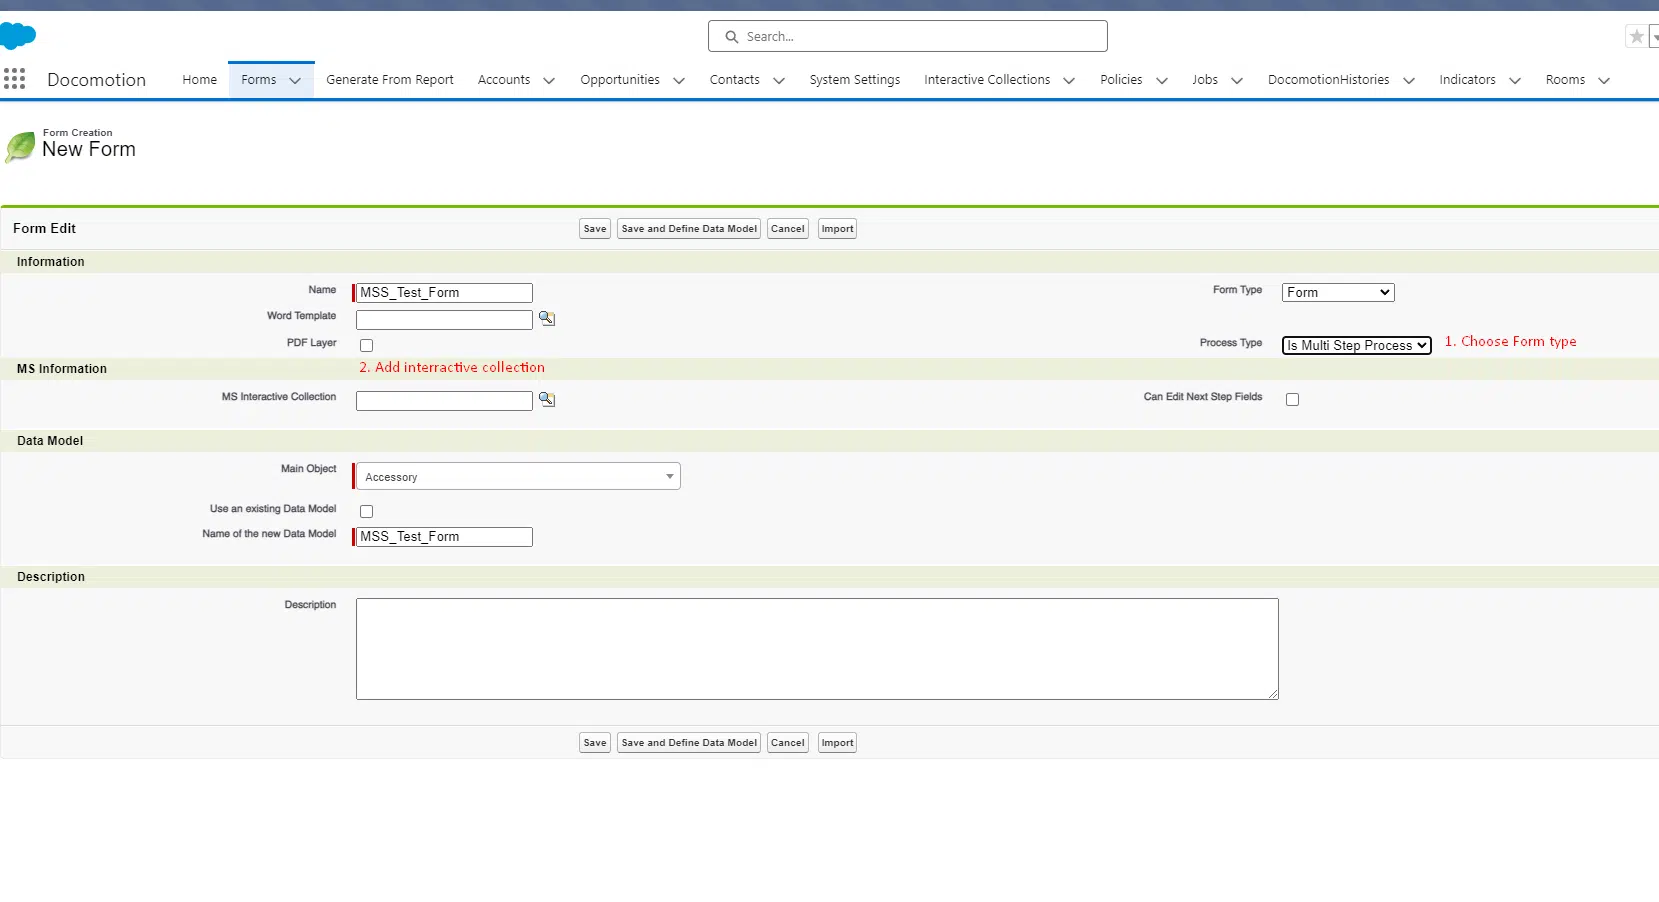
Step 1: Create Multi-Signers Form
To initiate the Multi-Signers process, follow these steps:
Choose Process Type:
- Start by creating a new form.
- Select “Multi Step Process” as the process type.
Add or Create Interactive Collection:
- Add an existing interactive collection or create a new one.
- Optionally, tick the “Can Edit next step Fields” checkbox to allow each recipient to edit the fields of the next step.
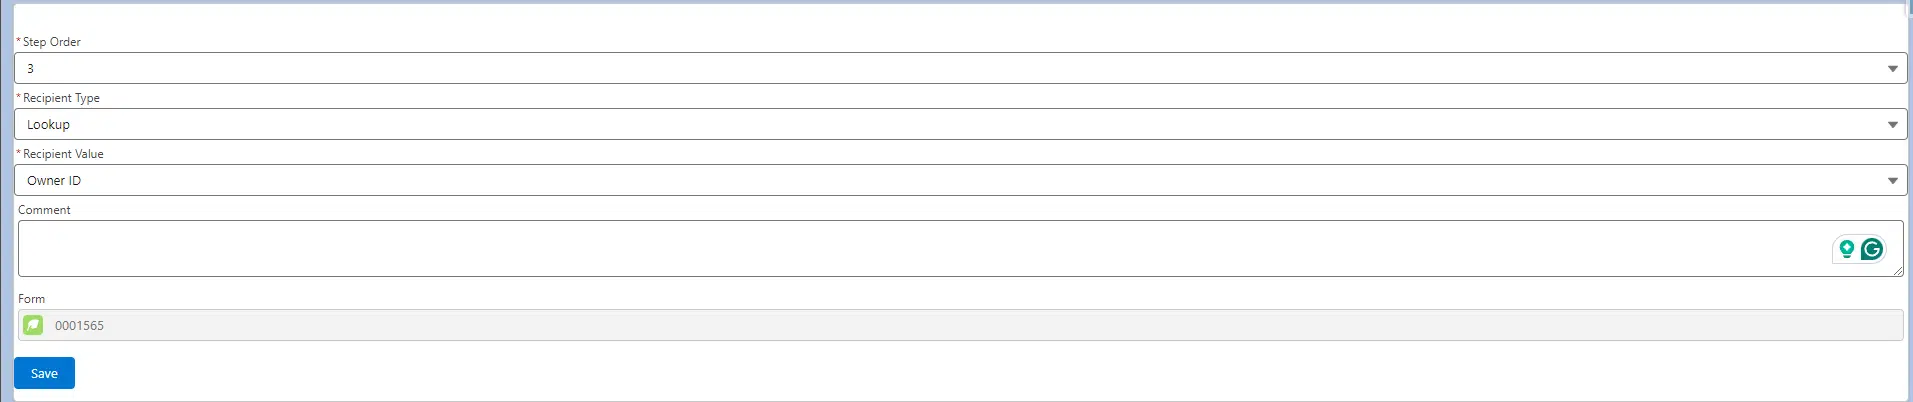
Step 2: Create a Recipient Chain
Set up the recipient chain by adding the recipients’ details.
- Under the ‘Step Signatures’ section, click the ‘New Step Signature’ button.
- Add recipient details by:
- Lookup from the Main Object.
- Text field from the Main Object.
- Free email – static address

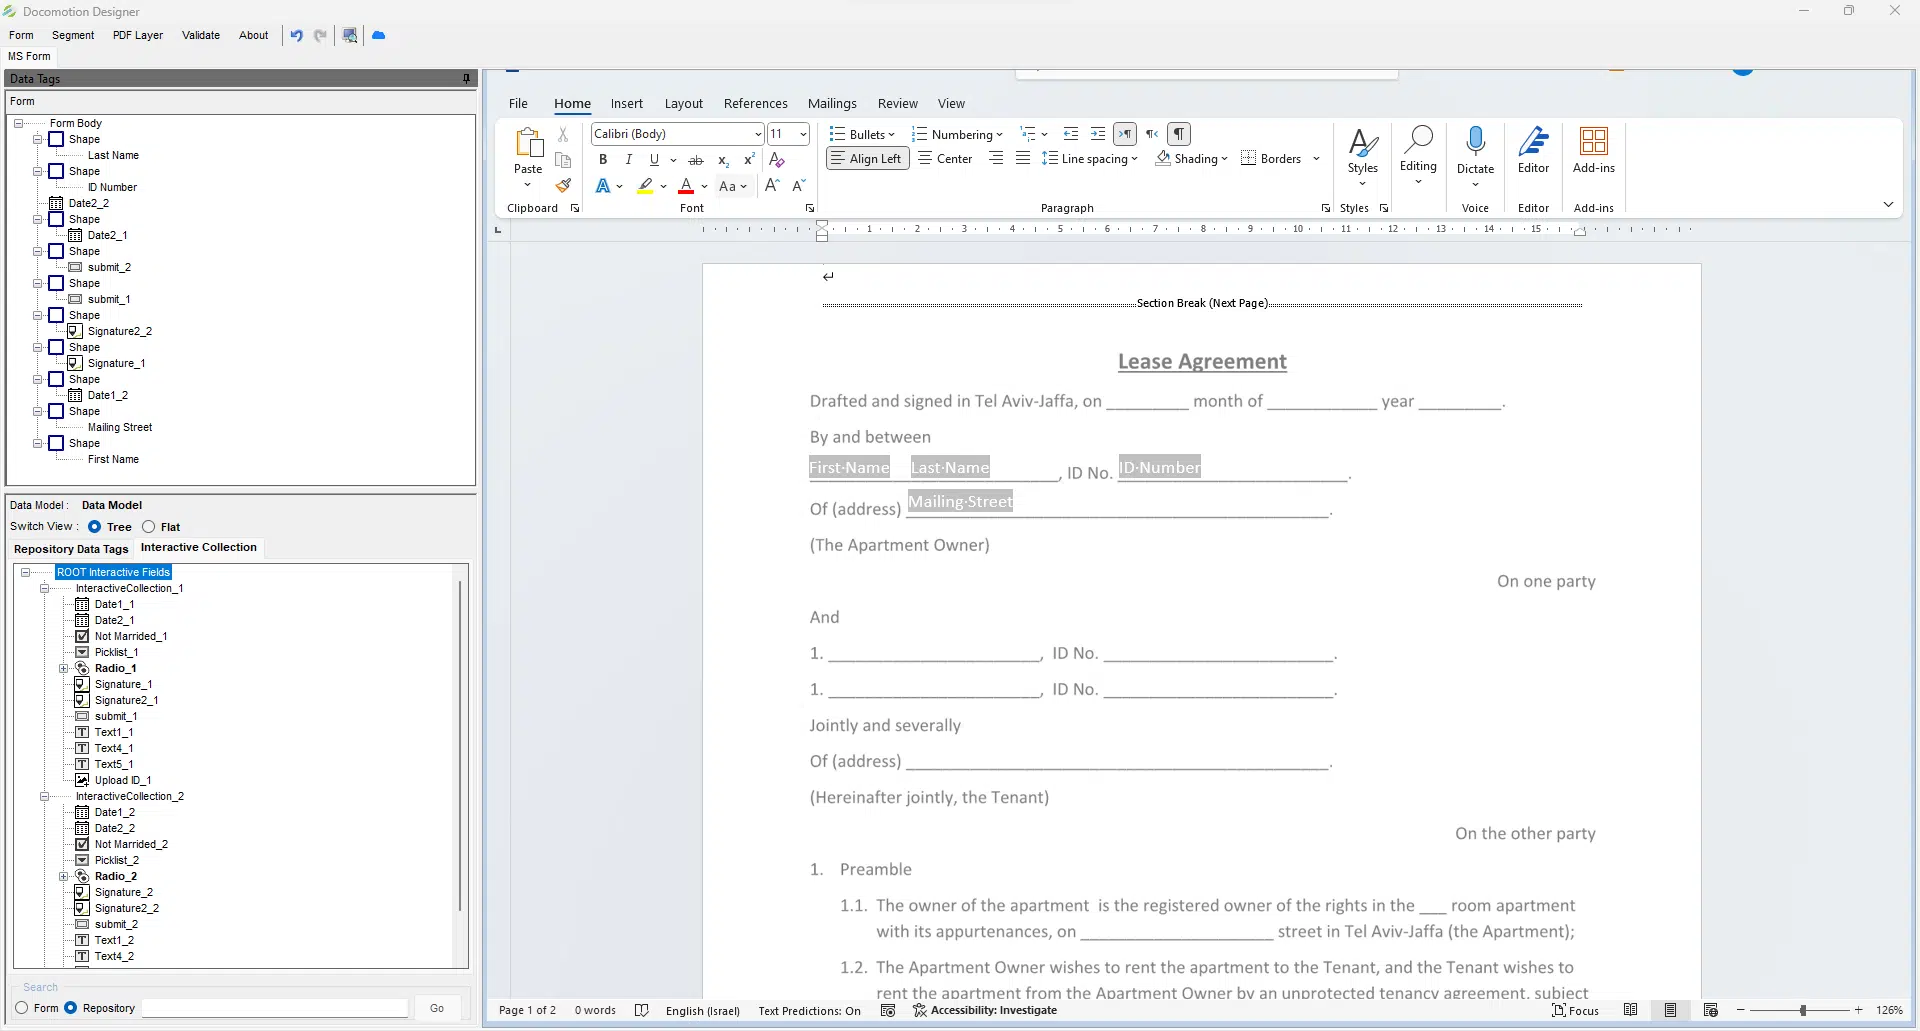
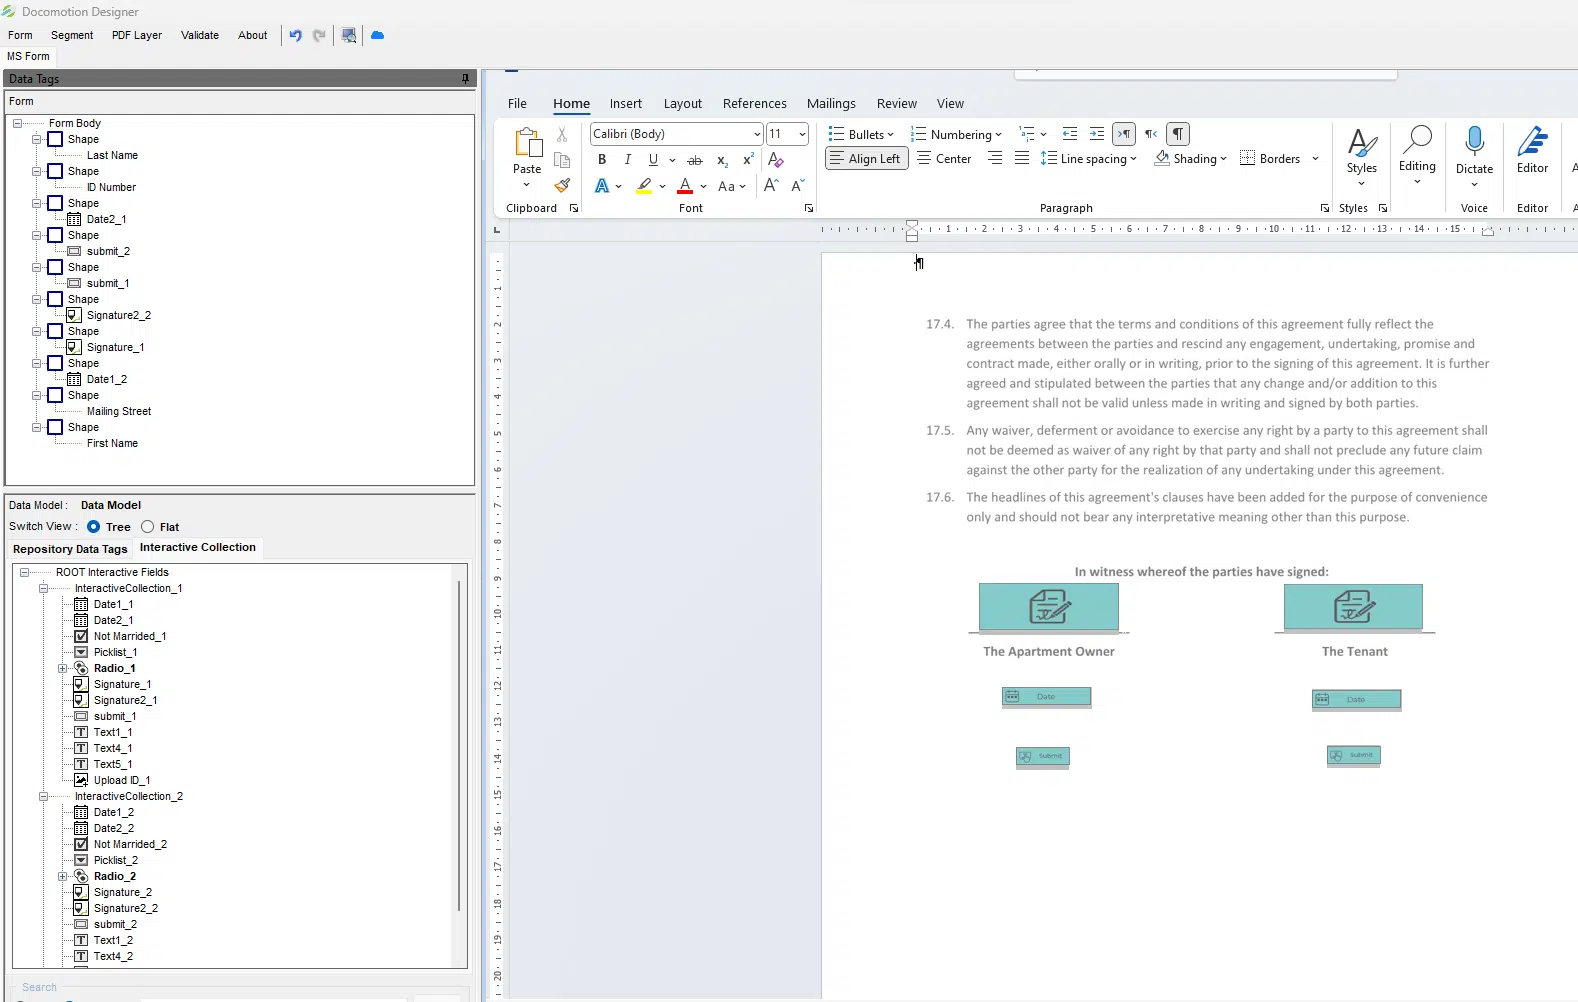
Step 3: Design Multi-Signers Form
Design the form to accommodate the multi-signers process:
Interactive Collection Fields:
- Each step has its own set of interactive collection fields.
Tagging and Shapes:
- Tag fields as regular tags or insert them as shapes.
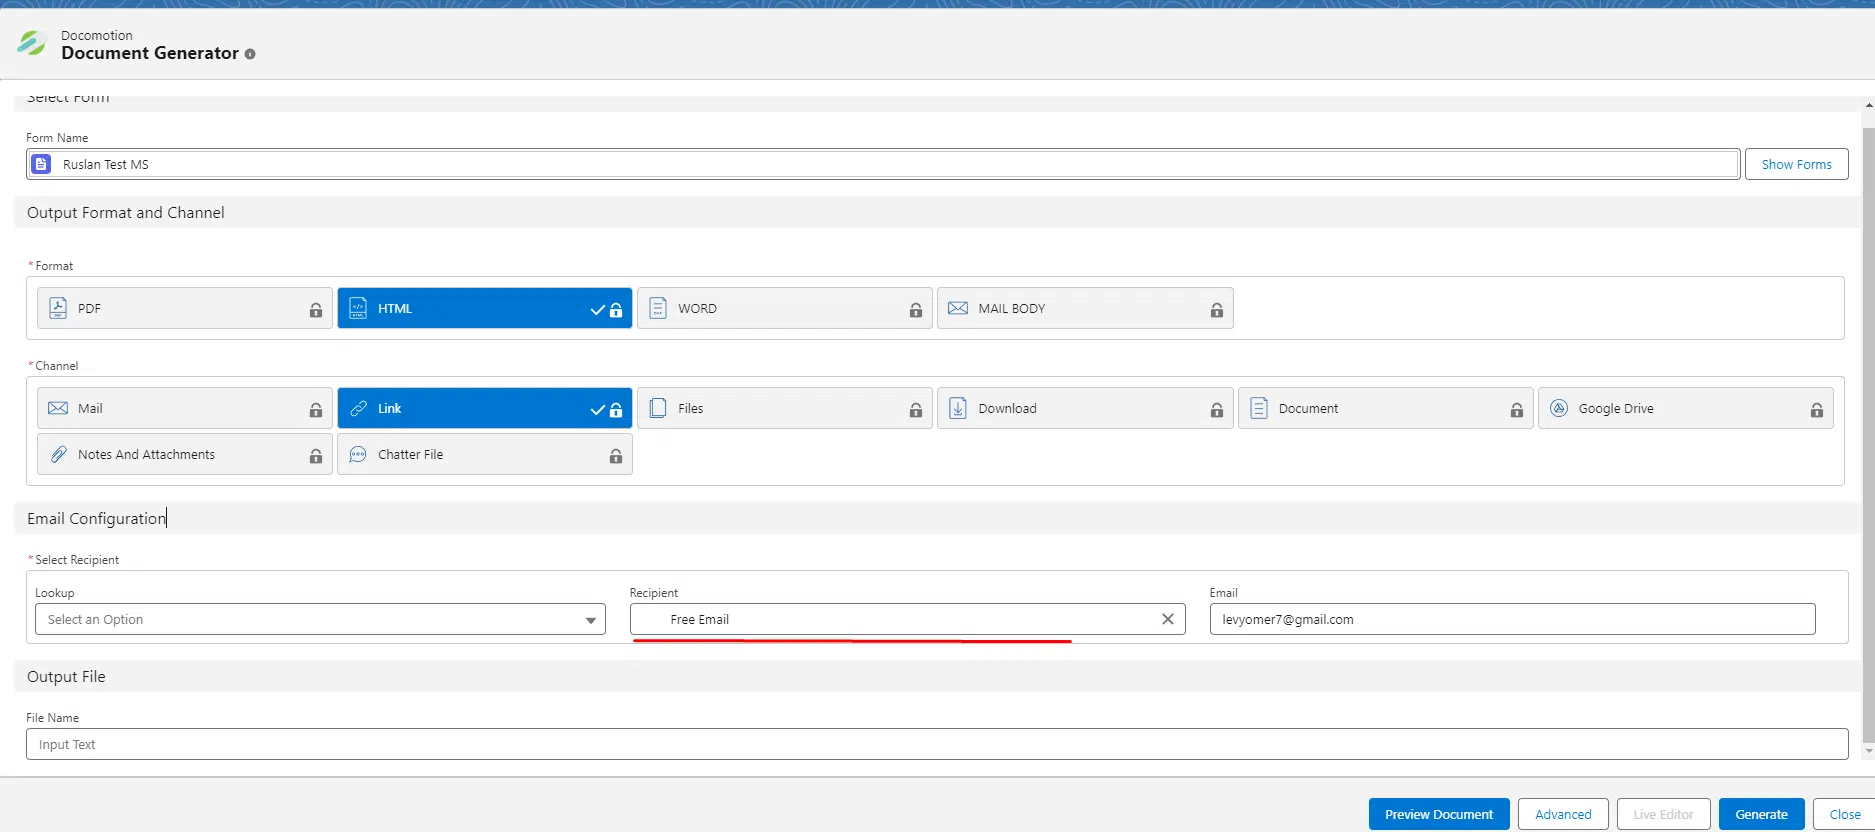
Step 3: Sending the Form
Sending the Form:
- Use the HTML/Link output.
- Note: You can change the first recipient email under the ’email configuration’ setting.
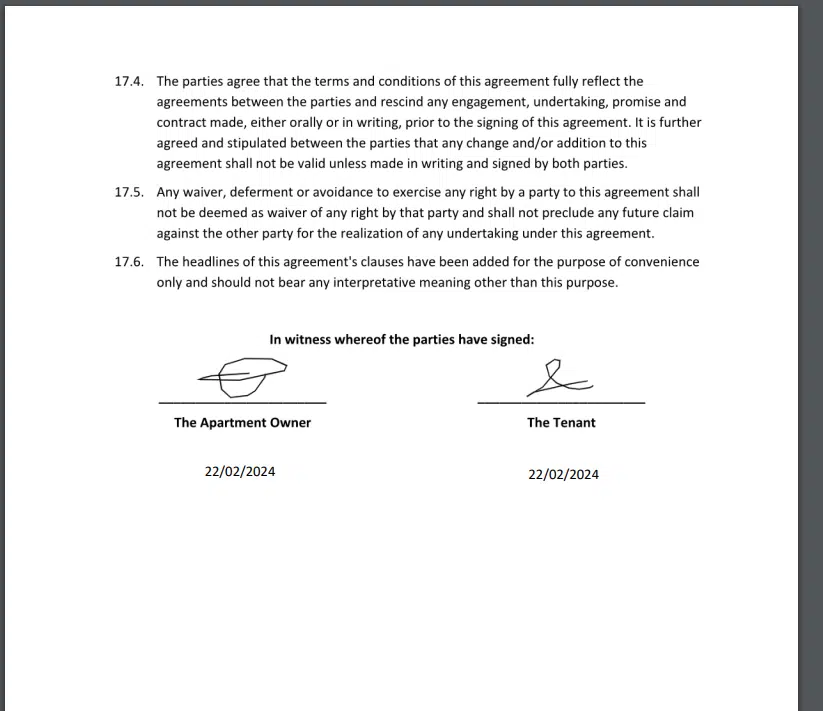
Step 4: Signing the Form
Each recipient, when his place in the sequence arrives, receives an email that contains a link to an HTML page, for his signature.
Notes:
- The first recipient can use Salesforce interactive fields to update records upon submission.
Few Comments:
1) The feature supports up to 10 Signers
2) Only one interactive collection can be added, and it will be the same for each step
3) A new field will be added automatically to the ‘Repository Data Tags’ named: ‘Active Step Number’, this field represents the active step of the signer in order to use logic and containers with this data