
Tables
Using graphical tables is essential for mapping and incorporating multiple recurring fields. Tables also facilitate the creation of complex forms.
To add a table:
- Choose Insert > Table.
- Drag the mouse on the grid to select the number and shape of cells.
Tip: Create the table based on the highest required number of columns and merge cells if necessary. Alternatively, choose Insert Table to specify the number of required columns/rows. Always opt for Fixed column width, as the table width corresponds to the workspace width.
- Tip: Create the table based on the highest required number of columns and merge cells if necessary. Alternatively, choose Insert Table to specify the number of required columns/rows. Always opt for Fixed column width, as the table width corresponds to the workspace width.
Table Properties
The default table style is Table Grid, and it is recommended to use this type for design. Right-click on the table and select Table Properties to access the Table Properties window.
Use the tabs in the window to update table properties. Some options affect selected cells, while others impact the entire table.
Table Definitions
Size Area:
- Define the preferred table width. Select Inches or Centimeters from the Measure in dropdown. Do not choose Percent.
- If you define a table width, click Distribute Columns in the table toolbar to recalculate column widths.
Alignment Area:
- Choose whether to align the table to the left, right, or center.
- Use the Indent from option to indent the table from page limits according to the table direction.
Text Wrapping Area:
- Always select None for text wrapping. The Around option is not supported and may cause the table to appear in the upper left corner of the output.
Table Direction Area:
- Select the table direction, automatically defined based on the text direction of the paragraph.
Tip: It’s recommended to align the table direction with the overall document direction.
Row Definitions
Size Area:
- Specify the height of the table row. This is the minimal height, and it increases as content is added.
Options Area:
- Define row behavior when the table spans multiple pages.
- Row Break: Uncheck to prevent rows from breaking between pages.
- Heading Row: Set a row to appear at the beginning of each new page if the table spans more than one page.
- Define row behavior when the table spans multiple pages.
Note: Avoid selecting dynamic data rows or the entire table.
Column Definitions
- Size Area:
- Define the preferred width of the columns. Select Inches or Centimeters. Do not select Percent.
Tip: Verify the column width in the output matches the edited document. The displayed width in the Ruler determines the actual column width.
Cell Definitions
Size Area:
- Define the cell width. Select Inches or Centimeters. Avoid selecting Percent.
Vertical Alignment Area:
- Define the vertical alignment of the cell content.
Options:
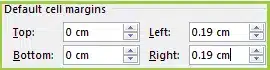
- Adding margins to the cell is not recommended as it may cause misalignment in the table.
Resetting Tables
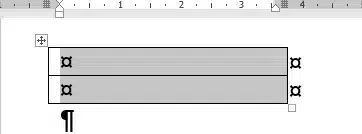
Tables include default left and right margins, which can cause design difficulties. Reset the table by:
- Open the Table Properties window.
- In the Table tab, click Options.
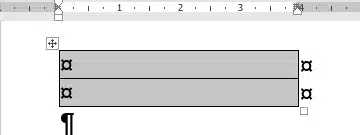
- In the Table Options window, set ‘Default cell margins‘ to 0.
- Click OK, and then click OK again to close the Table Properties window.
- If the table has several columns, select the whole table and click Distribute Columns in the table toolbar to recalculate column widths.
| Before Resetting | After Resetting |
|---|---|
|
|
|
|
Note: Define and change table borders and cell shading from the Table toolbar or Table Properties > Borders and Shading. These definitions apply only to selected cells.
Borders
Use the Borders tab to control the visual display of the table. You can define the border as a continuous line. Other border styles are not supported. Choose any border color and width from the lists. Diagonal borders are not supported.
Shading/Cell Fill
On the Shading tab, define the fill color of cells or the entire table. Transparency and patterns are not supported.
Table Toolbar/Table Tools
The table toolbar and tools are displayed when a table is selected. The two available tabs are Design and Layout.
Layout Toolbar:
- Select: Choose specific parts of a table.
- View Gridlines: Display gridlines during editing to simplify designing.
- Insert/Delete Rows and Columns: Add or remove rows and columns.
- Merge/Split Cells or Table: Split or merge cells sparingly for simplicity in design.
- Cell Dimensions: Define row height and column width.
- Align Cell Content: Define vertical and horizontal alignment of cell content.
- Autofit: Not supported for output, but can be used for design purposes.
- Draw Table: Avoid using; use Insert > Table for adding, splitting, or merging cells.
Tip: Use gridlines during editing to simplify designing and maintaining documents.
Always return to Fixed Column Width after using Autofit for design purposes.